Ubuntu 18.04 用 ceph-deploy 部署 Ceph 集群

概览

  1. 安装

  2. 初始化

  3. 集群配置

环境配置概览

节点 IP OS 配置(测试环境)
ceph01 192.168.3.164 Ubuntu 18.04 2C 4G 16G
ceph02 192.168.3.167 Ubuntu 18.04 2C 4G 16G
ceph03 192.168.3.168 Ubuntu 18.04 2C 4G 16G

基础配置

1,配置计算机名

1
2
3
hostnamectl set-hostname ceph01 # 节点ceph01执行
hostnamectl set-hostname ceph02 # 节点ceph02执行
hostnamectl set-hostname ceph03 # 节点ceph03执行

2,所有节点关闭防火墙

1
2
3
4
5
systemctl stop ufw
systemctl disable ufw
iptables -F && iptables -X && iptables -F -t nat && iptables -X -t nat
iptables -P FORWARD ACCEPT
#以上所有节点执行;Ubuntu 没有 SELinux,无需再 setenforce

3,配置hosts

1
2
3
4
5
6
7
8
9
10
11
12
vim /etc/hosts
127.0.0.1 localhost
#127.0.1.1 ubantu18-4
192.168.3.164 ceph01
192.168.3.167 ceph02
192.168.3.168 ceph03
# The following lines are desirable for IPv6 capable hosts
::1 ip6-localhost ip6-loopback
fe00::0 ip6-localnet
ff00::0 ip6-mcastprefix
ff02::1 ip6-allnodes
ff02::2 ip6-allrouters #所有 节点

4,配置免密

1
2
3
4
5
ssh-keygen #一路回车
cd ~/.ssh
ssh-copy-id -i ~/.ssh/id_rsa.pub root@ceph02 #复制ssh pubkey到ceph02节点
ssh-copy-id -i ~/.ssh/id_rsa.pub root@ceph03 #复制ssh pubkey到ceph03节点
ssh root@ceph03 #不用输密码登录即为成功

5,配置apt源

1
2
3
cp /etc/apt/sources.list /etc/apt/sources.list.back #备份
>/etc/apt/sources.list #清空
vim /etc/apt/sources.list #输入下面内容
1
2
3
4
5
6
7
8
9
10
11
12
13
deb http://mirrors.aliyun.com/ubuntu/ bionic main restricted universe multiverse
deb-src http://mirrors.aliyun.com/ubuntu/ bionic main restricted universe multiverse
deb http://mirrors.aliyun.com/ubuntu/ bionic-security main restricted universe multiverse
deb-src http://mirrors.aliyun.com/ubuntu/ bionic-security main restricted universe multiverse
deb http://mirrors.aliyun.com/ubuntu/ bionic-updates main restricted universe multiverse
deb-src http://mirrors.aliyun.com/ubuntu/ bionic-updates main restricted universe multiverse
deb http://mirrors.aliyun.com/ubuntu/ bionic-backports main restricted universe multiverse
deb-src http://mirrors.aliyun.com/ubuntu/ bionic-backports main restricted universe multiverse
deb http://mirrors.aliyun.com/ubuntu/ bionic-proposed main restricted universe multiverse
deb-src http://mirrors.aliyun.com/ubuntu/ bionic-proposed main restricted universe multiverse
deb https://mirrors.tuna.tsinghua.edu.cn/ceph/debian-pacific bionic main
deb https://mirrors.tuna.tsinghua.edu.cn/ceph/debian-octopus/ buster main
# deb-src https://mirrors.tuna.tsinghua.edu.cn/ceph/debian-octopus/ buster main

1
2
3
4
5
scp /etc/apt/sources.list ceph02:/etc/apt/ #文件拷贝到对应节点
scp /etc/apt/sources.list ceph03:/etc/apt/ #文件拷贝到对应节点
apt-get update #报错NO_PUBKEY E84AC2C0460F3994 ,安装对应的key
sudo apt-key adv --recv-keys --keyserver keyserver.ubuntu.com E84AC2C0460F3994 #安装完再执行
apt-cache madison ceph #检查ceph版本,要三个节点一致

image-20220526162911308

6,时间同步

1
2
3
apt install ntpdate -y #安装ntpdate
timedatectl set-timezone Asia/Shanghai #更改时区
ntpdate ntp1.aliyun.com #同步aliyun时间

安装ceph

1,安装ceph-deploy

1
2
apt-get install -y ceph-deploy #所有节点
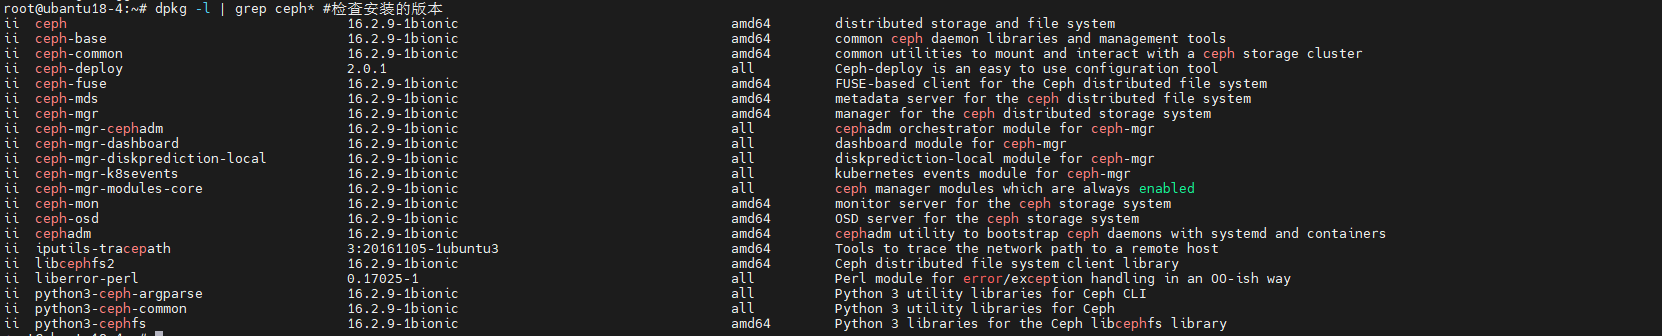
dpkg -l | grep ceph* #检查安装的版本三个节一致

image-20220526163350437

2,安装ceph

1
2
apt-get install ceph -y  #安装
dpkg -l | grep ceph* #检查安装的版本都要一致

image-20220526165507862

image-20220526201608191

1
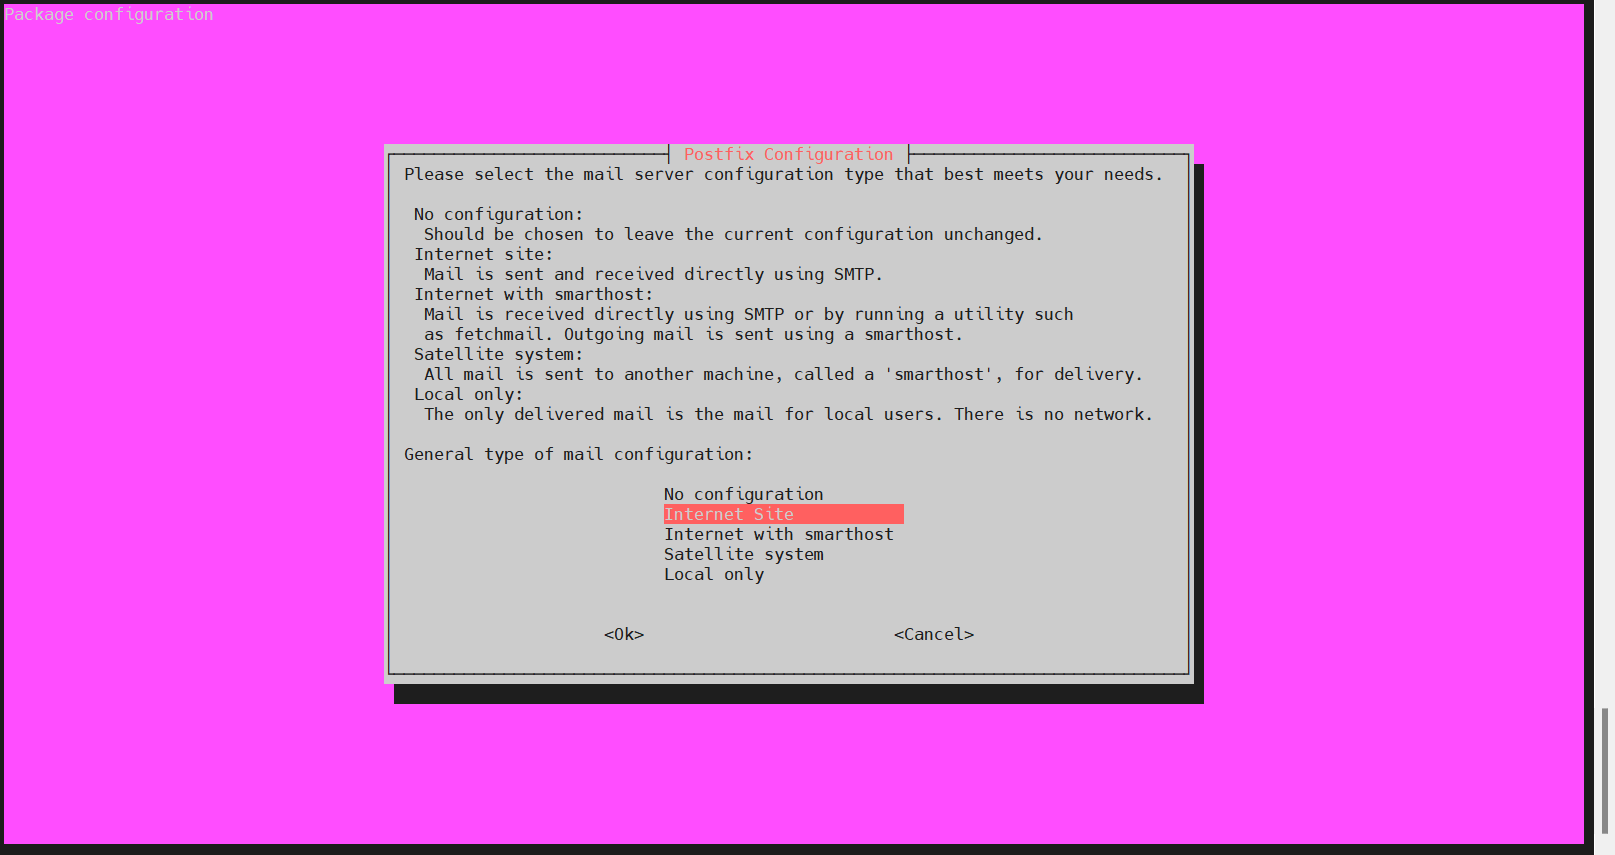
#出现这个直接回车

直接回车

3,初始化主要节点

1
2
3
4
5
6
7
mkdir /root/ceph-deploy #创建工作目录
cd /root/ceph-deploy #进入工作目录
ceph-deploy new ceph01 --public-network 192.168.3.0/24 #创建新的节点
#参数设置
--public-network 公共网络(客户端/MON 通信走这个网段)
--cluster-network 集群网络(OSD 之间复制/心跳的内部网段,不指定则与 public 共用)
#--public-network建议添加,否则后面添加monitor节点会提示错误 #主要节点
1
2
3
4
ls /root/ceph-deploy
ceph.conf ceph-deploy-ceph.log ceph.mon.keyring
ceph配置文件 ceph日志文件 keyring主要做身份验证
#我们可以根据自身需要修改ceph.conf文件,比如上面创建集群中添加的网络,在这里也可以添加 #主要节点
1
2
3
#添加允许ceph时间偏移
echo "mon clock drift allowed = 2" >>/root/ceph-deploy/ceph.conf
echo "mon clock drift warn backoff = 30" >>/root/ceph-deploy/ceph.conf #主要节点
1
ceph-deploy mon create-initial #初始化,会生成一大堆文件,这里不做赘述

image-20220526170100035

4,分配密钥到所有节点

1
2
3
4
5
ceph-deploy admin ceph01 ceph02 ceph03 #分配密钥
ceph config set mon auth_allow_insecure_global_id_reclaim false #禁用不安全模式
ceph-deploy --overwrite-conf config push ceph01 ceph02 ceph03 #修改配置后推送到对应节点
systemctl restart ceph-mon.target #修改后重启这个服务生效
ceph -s #查询状态

image-20220526170434166

配置集群

1,创建MGR

1
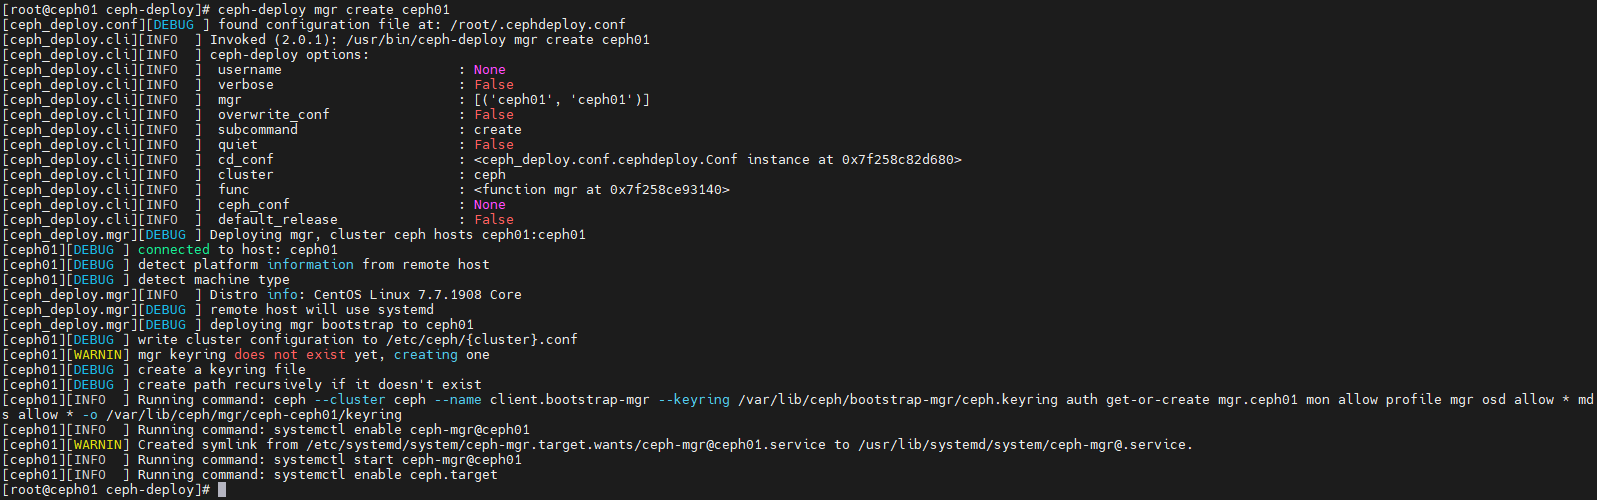
ceph-deploy mgr create ceph01

image-20220512094845724

2,查询刚才创建的MGR

1
ceph -s

image-20220512095233311

3,创建OSD

1
2
3
#需要给虚拟机新增硬盘,我的虚拟机是KVM的,可以参考如下,VMware和实体机的自行了解,硬盘插上就行,暂时不需要分区
qemu-img create -f qcow2 virtiob.qcow2 10G #创建10G新硬盘到虚拟机目录下,所有节点
lsblk #查新硬盘

image-20220512100825703

1
2
3
4
cd /root/ceph-deploy/ #进入目录
ceph-deploy osd create ceph01 --data /dev/vdb #创建ceph01OSD
ceph-deploy osd create ceph02 --data /dev/vdb #创建ceph02OSD
ceph-deploy osd create ceph03 --data /dev/vdb #创建ceph03OSD

4,查询OSD

1
ceph -s 

image-20220512101214647

1
ceph osd tree

image-20220512101250229

1
2
ceph-deploy --overwrite-conf config push ceph01 ceph02 ceph03
#如果期间我们有需要修改cpeh.conf的操作,只需要在ceph-01上修改,使用下面的命令同步到其他节点上

5,MON节点高可用

1
2
3
4
5
6
#扩展主节点(monitor)
#monitor负责保存OSD的元数据,所以monitor当然也需要高可用。 这里的monitor推荐使用奇数节点进行部署,我这里以3台节点部署,当我们添加上3个monitor节点后,#monitor会自动进行选举,自动进行高可用
#添加monitor
cd /root/ceph-deploy
ceph-deploy mon add ceph02 --address 192.168.3.167
ceph-deploy mon add ceph03 --address 192.168.3.168

6,查询节点高可用状态

1
ceph -s 

image-20220512102639021

1
2
ceph quorum_status --format json-pretty 
# 查询节点选举状态

输出结构和 CentOS 篇里贴的一致:quorum 里能看到三个 mon、当前 leader(ceph01),以及各 mon 的 v1/v2 地址,这里就不重复贴了。

7,部署MGR高可用

1
2
3
#mgr的方法与monitor(节点)方法类似
cd /root/ceph-deploy
ceph-deploy mgr create ceph02 ceph03

8,查询MGR高可用状态

1
2
3
ceph -s
#这里已经看到mgr已经添加上去,只有ceph-01节点为active,其余节点均为standbys
#mgr集群只有一个节点为active状态,其它的节点都为standby。只有当主节点出现故障后,standby节点才会去接管,并且状态变更为active

image-20220512103120624

9,部署dashboard(仪表盘)

1
2
3
4
5
6
sudo apt-get -y install ceph-mgr-dashboard #安装
ceph mgr module enable dashboard --force #启动仪表盘
sudo ceph dashboard create-self-signed-cert #创建自签证书
echo admin > userpass #创建密码
sudo ceph dashboard set-login-credentials admin -i userpass #创建用户,引用刚才的密码
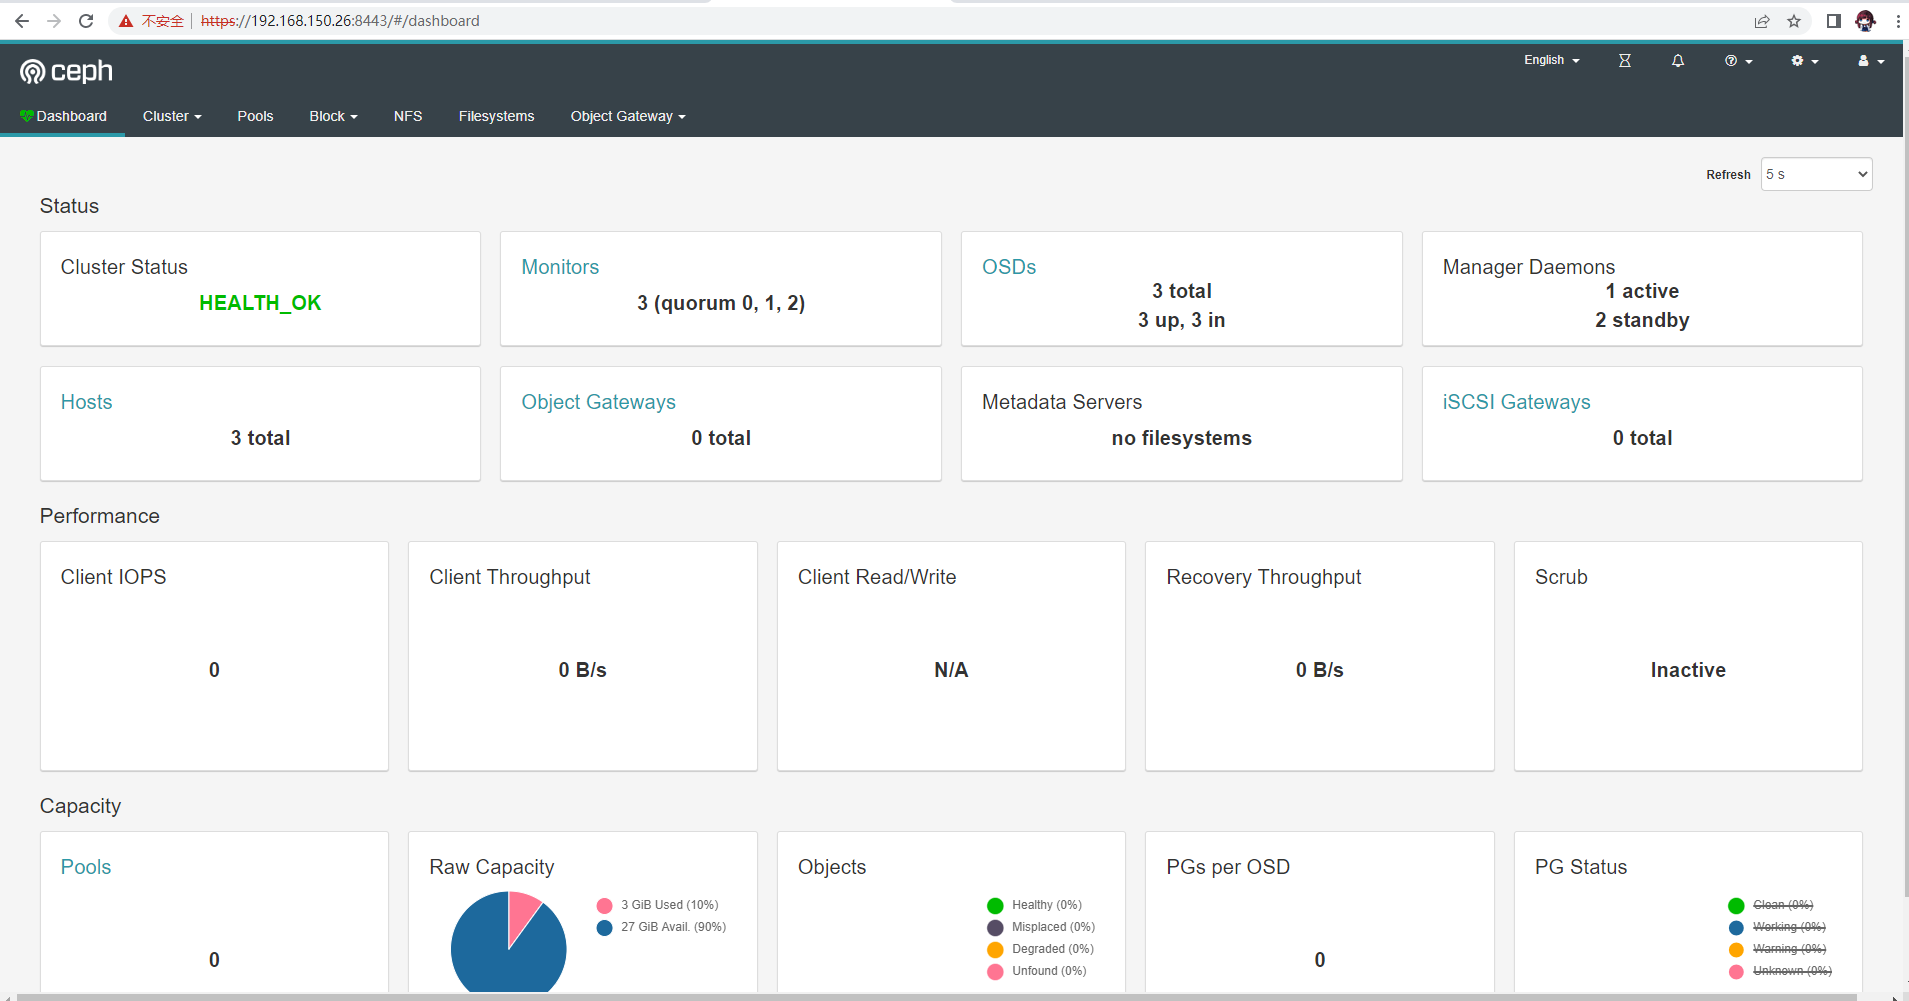
sudo ceph mgr services #查询仪表盘后台地址

image-20220512104028607

image-20220512104223978