概览
静态PVC&PV绑定
动态storageClass
环境配置
| 节点 |
主机IP |
系统 |
磁盘 |
配置 |
版本 |
| k8s-master01 |
192.168.3.93 |
centos8s-mini |
测试:16G 生产环境请酌情 |
2C4G |
1.23.6(最新) |
| k8s-master02 |
192.168.3.91 |
centos8s-mini |
测试:16G 生产环境请酌情 |
2C4G |
1.23.6(最新) |
| k8s-node01 |
192.168.3.92 |
centos8s-mini |
测试:16G 生产环境请酌情 |
2C4G |
1.23.6(最新) |
| k8s-node02 |
192.168.3.95 |
centos8s-mini |
测试:16G 生产环境请酌情 |
2C4G |
1.23.6(最新) |
| ceph01 |
192.168.3.125 |
centos7.9-mini |
测试:16+50G 生产环境请酌情 |
1C2G |
14.2.22 |
| ceph02 |
192.168.3.126 |
centos7.9-mini |
测试:16+50G 生产环境请酌情 |
1C2G |
14.2.22 |
| ceph03 |
192.168.3.127 |
centos7.9-mini |
测试:16+50G 生产环境请酌情 |
1C2G |
14.2.22 |
注:前半部分「静态 PV/PVC」用的是上表这套 CentOS 7.9 的 Ceph 集群(192.168.3.125-127,Nautilus);后半部分「动态 storageClass」当时是在另一套 Ubuntu 集群(192.168.3.164 / 167 / 168,就是 Ubuntu 安装篇里那套)上做的,原理完全一致,看命令时注意分清 IP。
静态PV&PVC
ceph节点配置
创建存储池
1
| ceph osd pool create kube 128 128
|
创建ceph账号和key
1
| ceph auth get-or-create client.kube mon 'allow r' osd 'allow class-read object_prefix rbd_children,allow rwx pool=kube'
|
- key 用 base64 编码一下(k8s 的 Secret 里存的是 base64 编码,不是明文)
1
2
| ceph auth get-key client.kube | base64
ceph auth get-key client.admin | base64
|

创建 kube下的image
1
| rbd create -p kube -s 5G ceph-image
|
k8s节点配置yaml
创建namespace
- 为了环境隔离,所有的都在cephfs空间完成
- namespaces.yaml
1
2
3
4
5
6
7
8
9
| cat > namespaces.yaml << EOF
apiVersion: v1
#namespace固定写法
kind: Namespace
metadata:
name: cephfs
labels:
name: cephfs
EOF
|
创建admin-secret
1
2
3
4
5
6
7
8
9
10
11
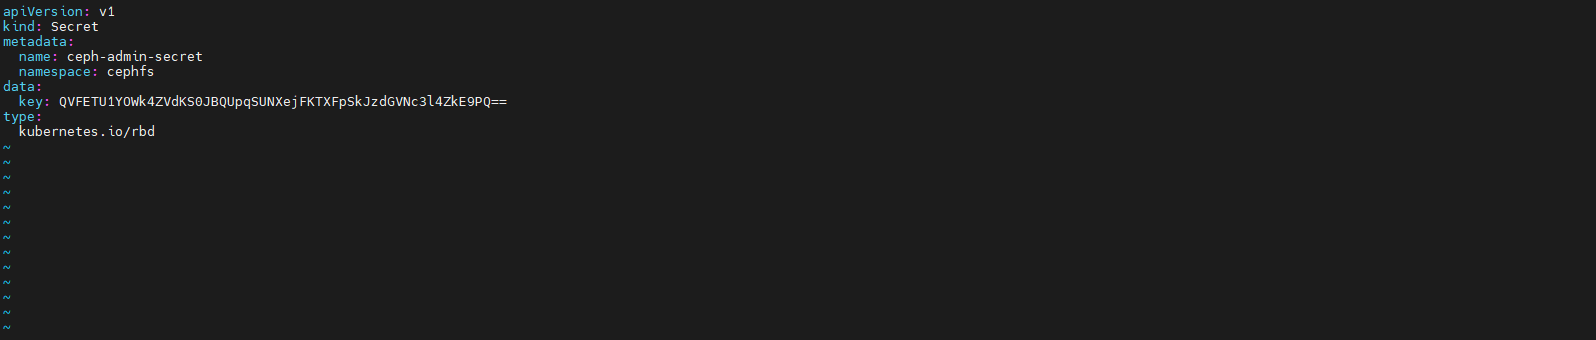
| cat > ceph-admin-secret.yaml << EOF
apiVersion: v1
kind: Secret
metadata:
name: ceph-admin-secret
namespace: cephfs
data:
key: #( admin 的key)
type:
kubernetes.io/rbd
EOF
|
创建kube-secret
1
2
3
4
5
6
7
8
9
10
11
| cat > ceph-kube-secret.yaml << EOF
apiVersion: v1
kind: Secret
metadata:
name: ceph-kube-secret
namespace: cephfs
data:
key: #( kube 的key)
type:
kubernetes.io/rbd
EOF
|
- 修改ceph-admin-secret.yaml和ceph-kube-secret.yaml,把对应key输入进去
创建测试用PV
1
2
3
4
5
6
7
8
9
10
11
12
13
14
15
16
17
18
19
20
21
22
23
24
25
| cat > pv.yaml << EOF
apiVersion: v1
kind: PersistentVolume
metadata:
name: ceph-pv-test
namespace: cephfs
spec:
capacity:
storage: 2Gi
accessModes:
- ReadWriteOnce
rbd:
monitors:
- 192.168.3.125:6789
- 192.168.3.126:6789
- 192.168.3.127:6789
pool: kube
image: ceph-image
user: admin
secretRef:
name: ceph-admin-secret
fsType: ext4
readOnly: false
persistentVolumeReclaimPolicy: Retain
EOF
|
创建测试用PVC
1
2
3
4
5
6
7
8
9
10
11
12
13
| cat > pvc.yaml << EOF
apiVersion: v1
kind: PersistentVolumeClaim
metadata:
name: ceph-test-claim
namespace: cephfs
spec:
accessModes:
- ReadWriteOnce
resources:
requests:
storage: 2Gi
EOF
|
创建测试用pod
1
2
3
4
5
6
7
8
9
10
11
12
13
14
15
16
17
18
19
20
| cat > pod.yaml << EOF
apiVersion: v1
kind: Pod
metadata:
name: ceph-pod
namespace: cephfs
spec:
containers:
- name: test-pod
image: busybox:1.24
command: ["sleep", "60000"]
volumeMounts:
- name: pvc
mountPath: /usr/share/busybox
readOnly: false
volumes:
- name: pvc
persistentVolumeClaim:
claimName: ceph-test-claim
EOF
|
发布
1
2
3
4
5
6
7
8
9
10
11
12
13
14
| [root@k8s-master01 pv-pvc]# ls
ceph-admin-secret.yaml ceph-kube-secret.yaml namespaces.yaml pod.yaml pvc.yaml pv.yaml
[root@k8s-master01 pv-pvc]# kubectl apply -f namespaces.yaml
namespace/cephfs created
[root@k8s-master01 pv-pvc]# kubectl apply -f ceph-admin-secret.yaml
secret/ceph-admin-secret created
[root@k8s-master01 pv-pvc]# kubectl apply -f ceph-kube-secret.yaml
secret/ceph-kube-secret created
[root@k8s-master01 pv-pvc]# kubectl apply -f pv.yaml
persistentvolume/ceph-pv-test configured
[root@k8s-master01 pv-pvc]# kubectl apply -f pvc.yaml
persistentvolumeclaim/ceph-test-claim created
[root@k8s-master01 pv-pvc]# kubectl apply -f pod.yaml
pod/ceph-pod created
|
查看状态
1
2
3
| kubectl get pv -n cephfs
kubectl get pvc -n cephfs
kubectl get pod -n cephfs
|

动态storageClass
ceph节点配置
cephfs方式支持k8s的pv的3种访问模式ReadWriteOnce,ReadOnlyMany ,ReadWriteMany
创建MDS
1
2
3
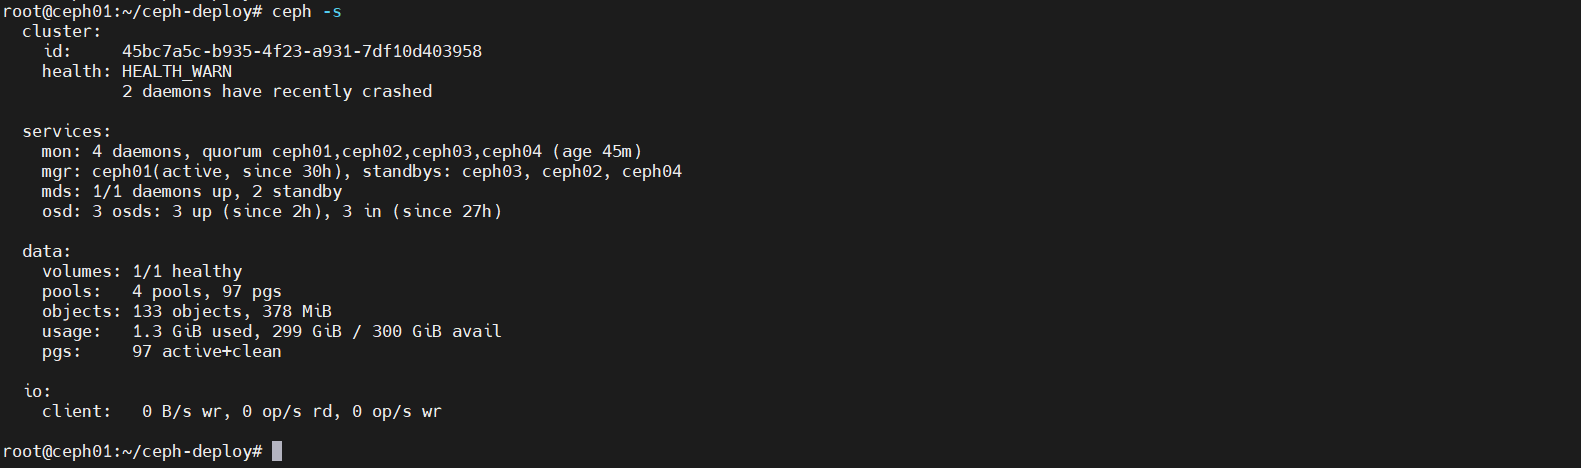
| ceph-deploy --overwrite-conf admin ceph01 ceph02 ceph03
ceph-deploy mds create ceph01 ceph02 ceph03
ceph -s
|
创建FileSystems
1
2
3
4
5
| ceph osd pool create cephfs-data 128 128
ceph osd pool create cephfs-metadata 128 128
ceph osd pool ls |grep cephfs
ceph osd lspools
ceph mds stat
|

1
2
3
4
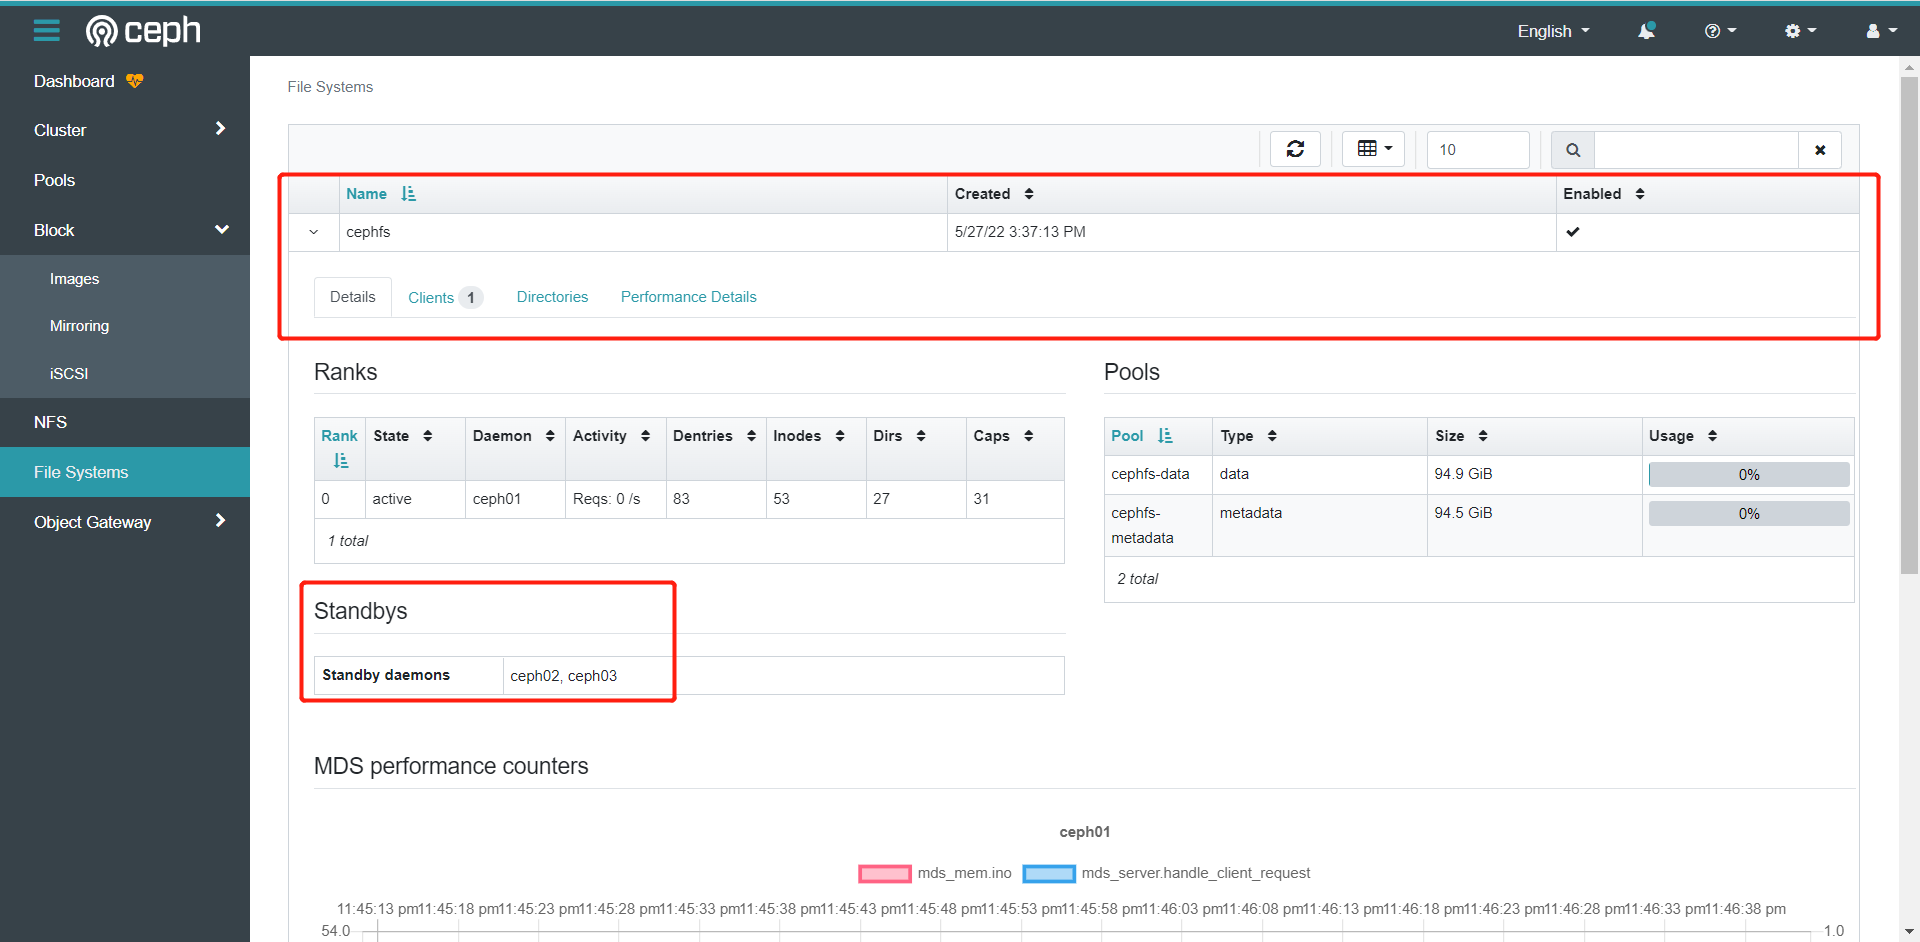
| ceph fs new cephfs cephfs-metadata cephfs-data
ceph fs ls
ceph mds stat
ceph fs status cephfs
|

1
2
|
ceph auth get-key client.admin | base64
|
k8s节点配置
1、创建命名空间
2、创建服务账户
3、创建角色
4、绑定角色
5、创建集群角色
6、绑定集群角色
7、部署 cephfs-provisioner
8、创建存储类
9、k8s集群要使用Ceph集群需要在每个Kubernetes节点上安装ceph-common # 不知道要不要,用静态的是一定要的,注意:安装ceph-common软件包推荐使用软件包源与Ceph集群源相同,软件版本一致。
创建ns
1
| kubectl create ns cephfs
|
创建密钥
1
2
3
4
5
6
7
8
9
| cat > ceph-secret.yaml << EOF # 创建密钥
apiVersion: v1
kind: Secret
metadata:
name: ceph-admin-secret
namespace: cephfs
data:
key: "QVFDalFZOWk5NnBpR3hBQUk2amxSQ3JGbHl5Uzc0eEsrdTd1b0E9PQ=="
EOF
|
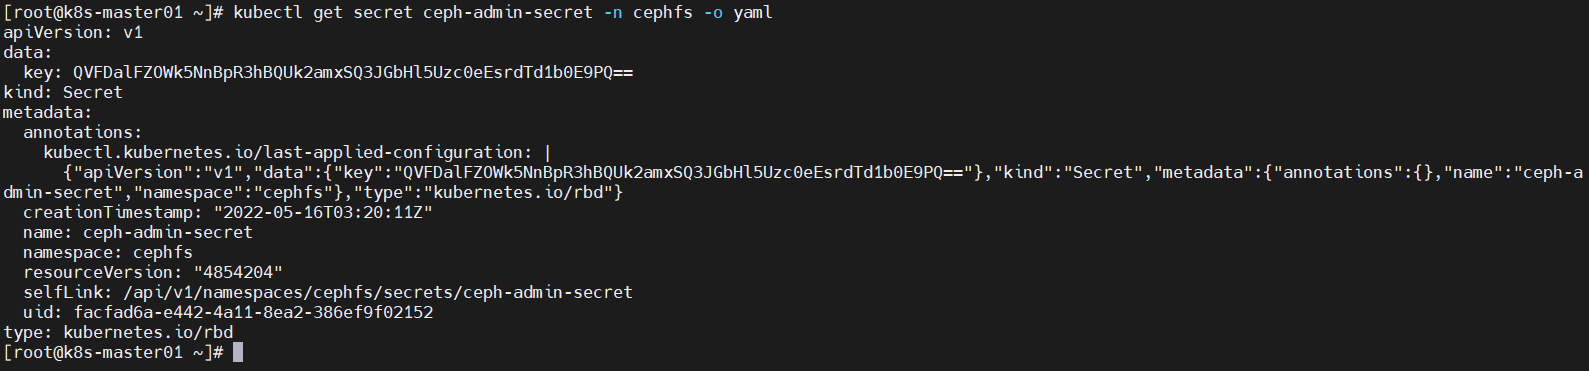
查看secret对比一下
1
| kubectl get secret ceph-admin-secret -n cephfs -o yaml
|
创建服务账户
1
2
3
4
5
6
7
| cat > serviceaccount.yaml << EOF # 创建服务账户
apiVersion: v1
kind: ServiceAccount
metadata:
name: cephfs-provisioner
namespace: cephfs
EOF
|
创建角色
1
2
3
4
5
6
7
8
9
10
11
12
13
14
| cat > role.yaml << EOF # 创建角色
apiVersion: rbac.authorization.k8s.io/v1
kind: Role
metadata:
name: cephfs-provisioner
namespace: cephfs
rules:
- apiGroups: [""]
resources: ["secrets"]
verbs: ["create", "get", "delete"]
- apiGroups: [""]
resources: ["endpoints"]
verbs: ["get", "list", "watch", "create", "update", "patch"]
EOF
|
绑定角色
1
2
3
4
5
6
7
8
9
10
11
12
13
14
| cat > rolebinding.yaml << EOF #绑定角色
apiVersion: rbac.authorization.k8s.io/v1
kind: RoleBinding
metadata:
name: cephfs-provisioner
namespace: cephfs
roleRef:
apiGroup: rbac.authorization.k8s.io
kind: Role
name: cephfs-provisioner
subjects:
- kind: ServiceAccount
name: cephfs-provisioner
EOF
|
创建集群角色
1
2
3
4
5
6
7
8
9
10
11
12
13
14
15
16
17
18
19
20
21
22
23
24
25
26
27
28
29
30
31
| cat > clusterrole.yaml << EOF # 创建集群角色
kind: ClusterRole
apiVersion: rbac.authorization.k8s.io/v1
metadata:
name: cephfs-provisioner
namespace: cephfs
rules:
- apiGroups: [""]
resources: ["persistentvolumes"]
verbs: ["get", "list", "watch", "create", "delete"]
- apiGroups: [""]
resources: ["persistentvolumeclaims"]
verbs: ["get", "list", "watch", "update"]
- apiGroups: ["storage.k8s.io"]
resources: ["storageclasses"]
verbs: ["get", "list", "watch"]
- apiGroups: [""]
resources: ["events"]
verbs: ["create", "update", "patch"]
- apiGroups: [""]
resources: ["services"]
resourceNames: ["kube-dns","coredns"]
verbs: ["list", "get"]
- apiGroups: [""]
resources: ["secrets"]
verbs: ["get", "create", "delete"]
- apiGroups: ["policy"]
resourceNames: ["cephfs-provisioner"]
resources: ["podsecuritypolicies"]
verbs: ["use"]
EOF
|
绑定集群角色
1
2
3
4
5
6
7
8
9
10
11
12
13
14
| cat > clusterrolebinding.yaml << EOF #绑定集群角色
kind: ClusterRoleBinding
apiVersion: rbac.authorization.k8s.io/v1
metadata:
name: cephfs-provisioner
subjects:
- kind: ServiceAccount
name: cephfs-provisioner
namespace: cephfs
roleRef:
kind: ClusterRole
name: cephfs-provisioner
apiGroup: rbac.authorization.k8s.io
EOF
|
部署 cephfs-provisioner
1
2
3
4
5
6
7
8
9
10
11
12
13
14
15
16
17
18
19
20
21
22
23
24
25
26
27
28
29
30
31
32
33
| cat > deployment.yaml << EOF #部署 cephfs-provisioner
apiVersion: apps/v1
kind: Deployment
metadata:
name: cephfs-provisioner
namespace: cephfs
spec:
replicas: 1
selector:
matchLabels:
app: cephfs-provisioner
strategy:
type: Recreate
template:
metadata:
labels:
app: cephfs-provisioner
spec:
containers:
- name: cephfs-provisioner
image: "quay.io/external_storage/cephfs-provisioner:latest" #镜像里面的ceph-common要和集群的一致
env:
- name: PROVISIONER_NAME
value: ceph.com/cephfs
- name: PROVISIONER_SECRET_NAMESPACE
value: cephfs
command:
- "/usr/local/bin/cephfs-provisioner"
args:
- "-id=cephfs-provisioner-1"
- "-disable-ceph-namespace-isolation=true" #添加
serviceAccount: cephfs-provisioner
EOF
|
创建存储类
1
2
3
4
5
6
7
8
9
10
11
12
13
14
| cat > class.yaml << EOF #创建存储类
kind: StorageClass
apiVersion: storage.k8s.io/v1
metadata:
name: cephfs
namespace: cephfs
provisioner: ceph.com/cephfs
parameters:
monitors: 192.168.3.164:6789,192.168.3.167:6789,192.168.3.168:6789
adminId: admin
adminSecretName: ceph-admin-secret
adminSecretNamespace: "cephfs"
claimRoot: /pvc-volumes
EOF
|
1、如果你只有一个 mon 监控节点服务,“monitors” 这一项就填一个,末尾没有逗号,我这里有三个!!!
2、“claimRoot” 用来设定 PV 创建在 Ceph 文件系统中的目录
- provisioner: 该字段指定使用存储卷类型为 kubernetes.io/rbd,注意 kubernetes.io/ 开头为 k8s 内部支持的存储提供者,不同的存储卷提供者类型这里要修改成对应的值
- monitors: ceph监控节点
- adminId: 这里需要指定两种 Ceph 角色 admin 和其他 user,admin 角色默认已经有了,其他 user 可以去 Ceph 集群创建一个并赋对应权限值,如果不创建,也可以都指定为 admin
- adminSecretName: 为上边创建的 Ceph 管理员 admin 使用的 ceph-secret,名字与secret.yaml里面定义的名字保持一致
- claimRoot: 在ceph上的目录结构
创建测试用PVC
1
2
3
4
5
6
7
8
9
10
11
12
13
14
| cat > claim.yaml << EOF # 创建测试用PVC
kind: PersistentVolumeClaim
apiVersion: v1
metadata:
name: claim1
namespace: cephfs
spec:
storageClassName: cephfs
accessModes:
- ReadWriteMany
resources:
requests:
storage: 1Gi
EOF
|
创建测试用POD
1
2
3
4
5
6
7
8
9
10
11
12
13
14
15
16
17
18
19
20
21
22
23
24
| cat > test-pod.yaml << EOF # 创建测试用POD
kind: Pod
apiVersion: v1
metadata:
name: test-pod
namespace: cephfs
spec:
containers:
- name: test-pod
image: busybox:1.24
command:
- "/bin/sh"
args:
- "-c"
- "touch /mnt/SUCCESS && exit 0 || exit 1"
volumeMounts:
- name: pvc
mountPath: "/mnt"
restartPolicy: "Never"
volumes:
- name: pvc
persistentVolumeClaim:
claimName: claim1
EOF
|
部署
1
2
3
4
5
6
7
8
9
10
11
12
|
kubectl apply -f serviceaccount.yaml
kubectl apply -f role.yaml
kubectl apply -f rolebinding.yaml
kubectl apply -f clusterrole.yaml
kubectl apply -f clusterrolebinding.yaml
kubectl apply -f deployment.yaml
kubectl apply -f class.yaml
kubectl apply -f claim.yaml
kubectl apply -f test-pod.yaml
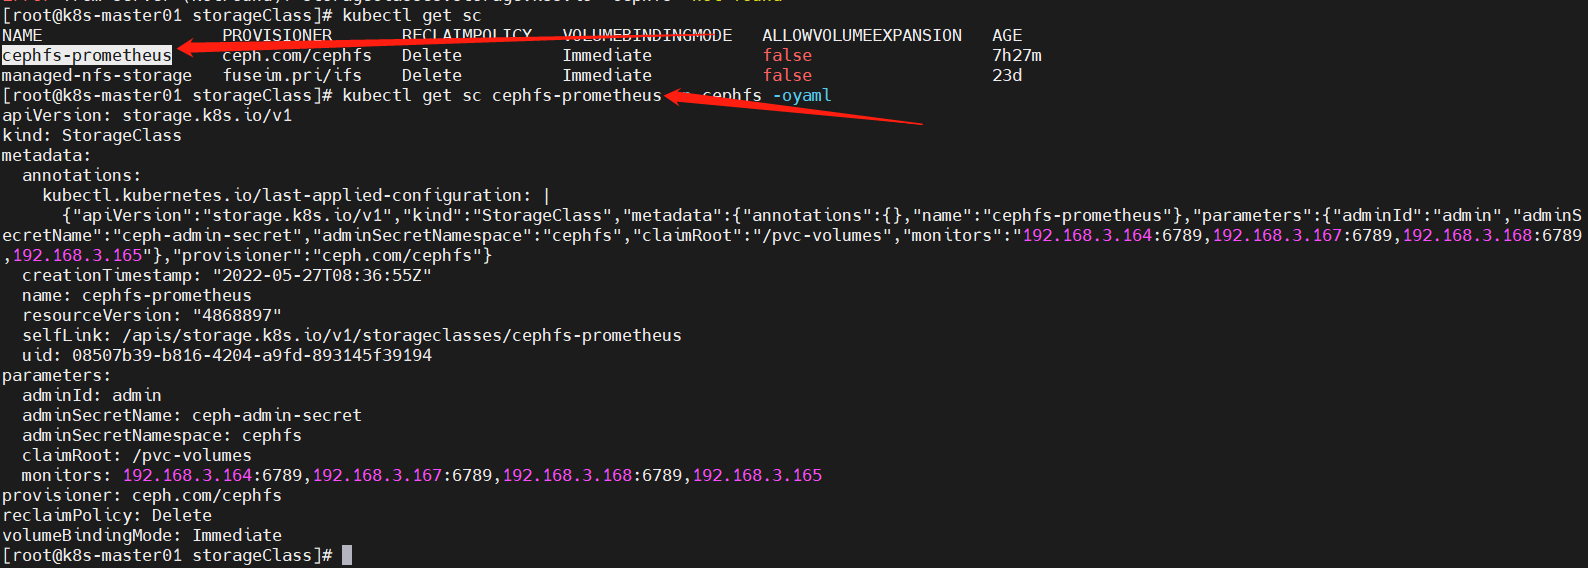
kubectl get sc -n cephfs
kubectl get sc cephfs -n cephfs -oyaml
|
查看